
























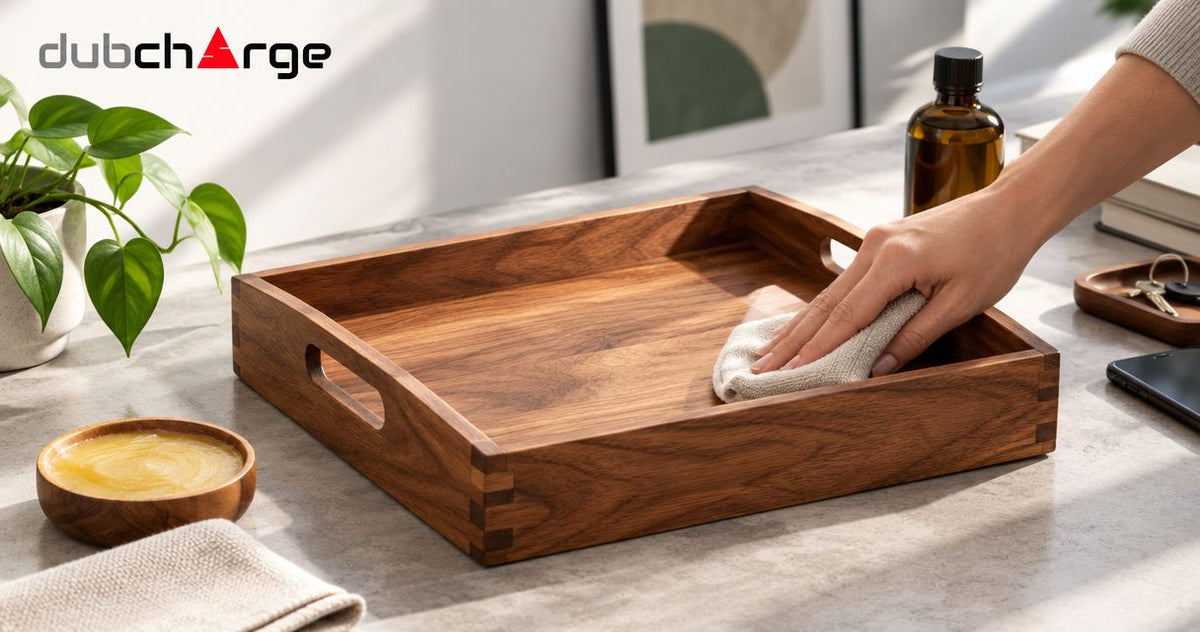
Care for a wooden accessory tray by removing loose debris, wiping it with a soft cloth barely dampened with water, and drying it promptly. Use a little mild soap for dirt that water alone will not lift, but never soak the tray, put it in a dishwasher, or apply oil without checking the finish and the maker’s instructions.
- How to care for a wooden tray: wipe gently, limit moisture, and dry before storage.
- For DubCharge wooden-tray owners, gentle cleaning is best for routine accessory care.
- Check the finish before using soap, oil, polish, or stain treatments.
- Keep wooden accessory trays away from standing water, hot objects, and direct heat.
Why this matters
Wooden trays need cleaning without prolonged wetting. Water left in seams, under a tray, or around fitted parts creates a different problem from a few crumbs on the surface.
Clean the dirt without saturating the material underneath it. That is the central rule for your 2026 care routine, whether the tray holds keys, small accessories, or other dry household items.
The wooden accessory range at DubCharge includes the Raw - Triple Flip Bamboo Magnet Rolling Tray With Built-in Ashtray. Its bamboo construction and fitted parts make material-specific instructions important; do not assume every surface or component tolerates the same treatment.
How do you care for a wooden accessory tray?
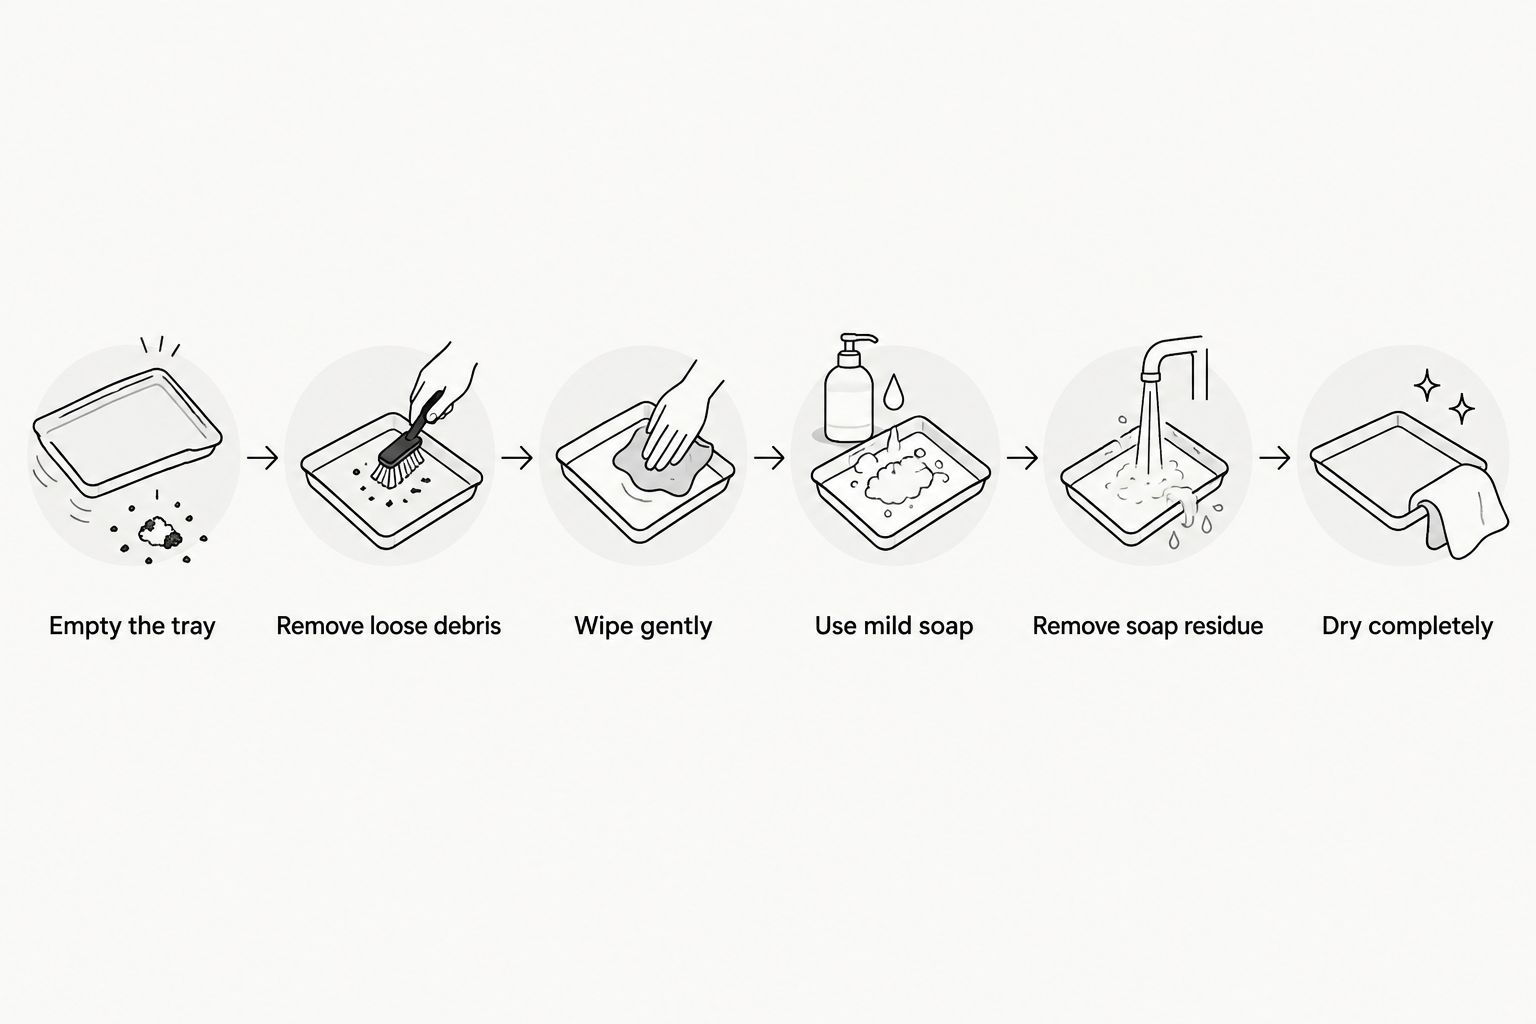
Use the following sequence for routine cleaning. If the manufacturer specifies a different method, follow those instructions instead, particularly for painted surfaces, glued sections, magnets, and hinges.
- Empty the tray. Remove everything, including removable inserts where the instructions permit. Work over a clear surface so small parts do not disappear into a sink.
- Remove loose debris. Use a dry, soft cloth or soft brush. Lift particles from corners rather than grinding them across the finish.
- Wipe gently. Wring out a damp cloth thoroughly before it touches the tray. Work in small areas without leaving water pooled on the surface.
- Use mild soap selectively. If water does not remove ordinary dirt, add a little mild soap to the cloth. Do not pour cleaner directly into the tray.
- Remove soap residue. Follow with a separate, barely damp cloth. Avoid repeatedly wetting the same joint or edge.
- Dry completely. Wipe with a dry cloth, then leave the tray uncovered with air reaching its surfaces. Replace the contents only when the tray and its seams are dry.
The cloth should do the cleaning, not a bath of water. If liquid runs into corners or drips from the tray, you are using more moisture than this routine requires.
Which cleaning approach fits your tray’s finish?
Identify the surface before choosing a treatment. A tray described as wood or bamboo does not automatically need oil: it might have a coating, paint, or a finish that requires different care.
Use this comparison when reviewing your tray’s care instructions in 2026. These are care categories, not promises about an individual product’s construction.
| Surface or construction | Best for | Advantage of this approach | Limitation or caution |
|---|---|---|---|
| Sealed or coated wood | Gentle surface cleaning | A soft cloth removes ordinary dirt without deliberately stripping the finish | Abrasives and incompatible cleaners can damage the coating |
| Unfinished wood | Minimal-moisture cleaning | Dry cleaning avoids unnecessary wetting | Bare wood absorbs spills readily; marks are not always removable |
| Oiled wood | Maintenance with the specified treatment | Compatible maintenance preserves the intended finish | Adding an unsuitable oil can change the surface or leave residue |
| Painted or printed wood | Protecting decoration | Light wiping avoids aggressive abrasion | Solvents and scrubbing can damage paint or printed details |
| Bamboo with fitted parts | Cleaning around joints and hardware | Targeted wiping limits moisture around attachments | Material alone does not establish whether soaking or oiling is appropriate |
If you cannot identify the finish, start with dry cleaning. Look for the care label or ask the manufacturer before escalating to a cleaner, conditioner, or polish.
Do not test an uncertain chemical on the most visible area. A hidden-area test can reveal discoloration, but it does not override an instruction against using that chemical.
Why wooden-tray care varies
The right method depends on the surface and construction, not just the word “wood” on a listing. Check these factors before treating a stain:
- Finish: Bare wood, oil finishes, paint, and clear coatings respond differently to cleaning products.
- Joints: Glued seams and layered construction need protection from prolonged moisture.
- Fitted parts: Magnets, hinges, and attached components create places where moisture can collect.
- Existing damage: Cracks, lifting coatings, and rough edges need assessment rather than harder scrubbing.
- What caused the mark: Loose dust, a fresh spill, and discoloration beneath a finish are different cleaning problems.
- Storage conditions: A damp counter, sunny window, or nearby heater adds stress even when cleaning is gentle.
Make those checks part of a 2026 maintenance checklist rather than following a fixed calendar for every treatment. Clean when dirty; condition only when the finish’s instructions call for it.
What should you do after a spill?
Blot a spill promptly with a soft, absorbent cloth. Lift the liquid instead of spreading it toward seams, then clean the affected area gently and dry it.
Check underneath the tray as well. A dry-looking top does not mean the counter-facing surface is dry, especially if liquid ran over an edge.
For a sticky spill, use a barely damp cloth and mild soap if the finish permits it. Follow with a clean, barely damp cloth, then dry; do not keep scrubbing once the surface itself starts changing.
What if a water mark remains?
A remaining mark does not automatically mean more cleaning is needed. Discoloration can sit in the coating or the wood rather than on top of it.
Avoid household stain-removal tricks involving heat, abrasive powders, or improvised chemical mixtures. Stop if the finish turns cloudy, becomes tacky, or transfers onto the cloth, and ask the manufacturer about finish-specific treatment.
What if the tray smells musty?
Empty the tray and inspect both faces, seams, and the storage surface. Do not cover the smell with fragrance or seal the tray away while it is damp.
Visible growth or persistent mustiness is not a routine polishing problem. Stop using the tray until you have appropriate material-specific advice; wiping the visible surface alone does not establish that the problem is resolved.
Should you oil a wooden accessory tray?
Oil a wooden tray only when its manufacturer or finish instructions call for oil. A dry-looking patch is not enough to identify the correct treatment, and an existing coating can prevent oil from penetrating as intended.
Do not pour kitchen oil onto an unidentified finish. Some cooking oils become rancid, while a product intended for one wood finish is not automatically compatible with another.
For your 2026 care supplies, keep the cleaner and the finish treatment separate in purpose. Cleaning removes dirt; a compatible maintenance treatment serves a specific finish. Neither task justifies coating magnets, hinges, or glued joints.
The same distinction matters when caring for olivewood jewelry: identify the finish and any attached materials before applying a treatment, rather than assuming that everything made from wood needs the same oil. A tray and a small wooden accessory share a material category, not necessarily a maintenance formula.
If treatment is approved, follow the product’s application and drying instructions. Remove excess as directed, and do not put accessories back onto a surface that remains wet or tacky.
How should you store a wooden tray?
Store the tray clean, dry, and away from direct heat. Choose a stable shelf or counter rather than a damp windowsill, radiator cover, or place where spills collect underneath it.
Avoid putting a freshly wiped tray into a closed bag or stacking another tray directly over it. Let moisture escape first, including from the underside and recesses.
A simple layout prevents avoidable damage:
- Keep wet containers off the wood or use a suitable protective barrier.
- Keep hot objects and burning materials away from the wooden surface.
- Leave room to lift the tray without dragging it over grit.
- Keep sharp accessories from scraping decorative surfaces.
- Do not store heavy objects on thin, folding, or unsupported sections.
An attached ashtray or insert does not make the surrounding wood heatproof. Follow the maker’s instructions for that component, and never treat the wooden body as a surface for extinguishing burning materials.
What should you avoid when cleaning wood?
Avoid immersion, dishwashers, steam cleaning, and aggressive scrubbing unless the manufacturer expressly permits a method. A quick cleaning shortcut can damage a finish that ordinary wiping would preserve.
Keep bleach mixtures, strong solvents, and abrasive pads out of a routine wooden-tray cleaning kit. A cleaner being suitable for glass, metal, or a bathroom surface does not establish that it is suitable for coated wood.
Use one compatible cleaning product as directed, not a homemade combination. Keep the work area clear of unrelated cleaners so you do not accidentally transfer residues between cloths.
Also avoid using a knife or metal scraper to remove stuck material. If gentle cleaning does not release it, stop rather than cutting into the finish or opening a seam.
When does a tray need more than routine cleaning?
Set the tray aside if you find splinters, sharp edges, a separating joint, loose hardware, or a coating that flakes off during wiping. Cleaning does not repair structural damage.
For DubCharge accessory-tray owners, the useful distinction is between dirt and damage. Dirt calls for an appropriate cleaning method; a damaged tray calls for manufacturer guidance about continued use or replacement.
Do not force a swollen lid, hinge, or fitted section back into place. Let the item dry naturally and seek advice rather than applying heat or attempting an improvised repair.
During a 2026 condition check, inspect the underside and corners as carefully as the center. Those less-visible areas can reveal trapped moisture, rough edges, or joint separation before you notice a problem on top.
FAQ
What's the safest way to clean a wooden accessory tray?
The safest routine method is to remove debris, wipe with a soft, barely damp cloth, and dry promptly. Use mild soap only when needed and permitted by the finish instructions.
Can I put a wooden tray in the dishwasher?
Do not put a wooden tray in the dishwasher unless its manufacturer explicitly permits it. Heat, prolonged wetting, and detergent can damage wood, finishes, and glued joints.
Should I oil my wooden tray after every cleaning?
Do not oil a wooden tray after every cleaning unless its care instructions require that treatment. Check the finish first and use only a compatible maintenance product.
Can I use olive oil on a wooden accessory tray?
Do not use olive oil as a default wooden-tray treatment. Cooking oil is not a substitute for the maintenance product specified for the tray's finish.
How do I dry a wooden tray after wiping it?
Dry a wooden tray with a soft cloth, then leave it uncovered where air can reach its surfaces. Keep it away from heaters and replace the contents only after the tray and seams are dry.
Can a wooden accessory tray hold unwrapped food?
Use a wooden accessory tray for unwrapped food only when the manufacturer identifies it as suitable for food contact. A wooden appearance or smooth finish does not establish food-contact suitability.
What should I do if my wooden tray starts cracking?
Stop using a wooden tray with cracks, splinters, or separating joints until you have manufacturer guidance. More oil or harder cleaning does not repair structural damage.
One last thing
Check the surface underneath the tray. A damp counter can keep the underside wet even after you have dried the top, so lift the tray, wipe its resting place, and let both surfaces dry before putting it back.


Leave a comment
This site is protected by hCaptcha and the hCaptcha Privacy Policy and Terms of Service apply.